Showing posts with label studio. Show all posts

Sunday, January 31, 2021

new bedding

I'm mesmerized by the cosmos and hubby is a fan too, so when I came across this colorful sheet set I instantly ordered it. When we switched from a queen bed to a king I looked for a bed cover I liked, but didn't find anything. That's when I decided to convert the queen sheet set to a king bed cover with pillow shams. I found a navy king quilt, cut the flat sheet so the quilt border was the same size all around and attached it to the quilt. Next up were the pillow shams. The project took most of January, fitting in a few hours each weekend, but it's done and we're both pleased with the results. Oh! And here's a 'before' photo of the sheets piled on the new folding sewing table hubby built for me. Love it and him! ♥ 


Believe,
Di

Monday, February 24, 2014

in the beginning


This morning I came across this photo of the north side of my craft studio about 10 years ago. When I started di-did-it, I primarily sold floral arrangements, and this is how I stored my materials. The tubs were originally stacked on the west side of the studio, but it was a hassle to move the ones on top to get to the ones down low. The system shown above allowed the tubs to rest on wooden slats and pull out like drawers -- so much nicer. I kept the lids loosely on them just to keep dust at bay. Yes, I'm grateful for my talented hubby -- just told him exactly what I wanted and he built it. He surprised me with the ribbon storage made from wooden dowels slid into special grooved holders.... very similar to the tension rods you now see on Pinterest. 

Today this area of the craft studio is where you'll find my sewing machine and treadmill (click here to see a photo). It seems my craft area is always changing as my interests change. How about you? Do your creative interests change over time or have they remained fairly consistent? 

Here's to creative outlets, however long-lived they are! :)

Believe, 
Di

PS - If you want more craft area organizing tips, check out Location Matters on Facebook

Sunday, January 5, 2014

if it matters to you, do it

As I was reorganizing the north side of my studio this weekend to accommodate the sewing machine table, I dug through my stash of odds and ends for a shelf to use. This little one was just the right size, and was my favorite Aunt's so it brings wonderful memories each time I look at it. The issue is... I'm just not a bright brass kind of girl. What to do, what to do... 


Experimentation ensued and after a little playing around with alcohol inks, India inks and the heat gun, the leaves are now richly colored. 


At this point, the shelf is up and I'm ready to sew with ease when the mood strikes. At the moment, however, I'm itching to work with metals or some mixed media. It's the scanner* in me -- loving a wide variety of crafts. How about you? Do you focus on one or two or do you flitter about among several? 


* Scanner is a term coined by Barbara Sher for those of us with "hit and run" obsessions, eager to explore many paths. The trait comes with pros and cons, as most things in life do. And as with most things, it's best to embrace it as part of who we are and make the most of it. 

I'll end with this quote from Queen Latifah: 

"I wish every woman would love herself 
and embrace what she was given naturally." 

Believe, 
Di 

Sunday, December 8, 2013

experimenting with lava bright silk

So I'm at the Woodsmith Store with my hubby the other day and I spot this really beautiful stick of acrylic (Lava Bright Stick). Hubby tells me it's for making pens. I think it would make cool jewelry, ask if I can cut, sand and and drill it, and when told yes, purchase it. Last night I pulled out my baby table saw and dremel attachments and started experimenting. The saw blade cut through it just fine but man oh man did it make a mess and stink beyond words. The saw blade left marks so I used the baby belt sander, which also made a mess and stunk up the whole house. The belt sander left scratches so I proceeded to use a series of dremel attachments to end up with a smooth and polished product. You can see the mess in the photo below (guess you can't actually see all the plastic shavings all over, but they're there). 


Doing some research online today, I read that wet sanding is recommended when turning the acrylic for pens. Doesn't matter. At this point, the majority of the product is in the trash. The house wreaked so bad that, even though the temp was in the teens, I had to open windows and turn on fans (in case you're wondering, yes, I wore goggles and a face mask when I was sawing, sanding, etc.). Long story short, I'm hoping to salvage the pieces I worked on and make a few pair of earrings (the acrylic really is absolutely beautiful stuff) but after that, I don't ever plan to work with the stuff again. 

The shop area of the studio is back in order (smile). 


So after that little exercise, I yearned to work with something I'm familiar with and enjoy not only the process but the results. If you guessed metal & Friendly Plastic, you're right! Here's a sneak peak of the current WIP: 


So, tell me, what new thing did you try or learn about this weekend? 

Believe, 
Di

Sunday, March 3, 2013

first WIPs for quite awhile

In case you're wondering if I'm actually creating, since my posts so far this year don't show it, here are some current WIPs as well as the chaotic state of my studio. Fun is being had here ^smile^ and I hope it's occurring where you are too. 


Believe, 
Di

Wednesday, October 7, 2009

postscript to virtual studio tour

I had a great time this past weekend visiting all the studios on the tour (at least I think I made it to all of them). What a visual treat to see such varied work spaces, each enabling those creative souls to express themselves and make this world a better place. My special thanks to those of you who visited my studio via my blog and especially those who left a kind comment. You truly brightened my day.

Speaking of comments, I received several comments about the metal strip at the bottom of one of the shelving units. I'd like to share a few more of these little niceties that make the area so functional. If you can take away a helpful idea from here, my mission is complete {smile}.


Drawer slides work great for printers that open on top for scanning and for other items that need to be opened from the top when used (like my Silhouette).


An eight-outlet electrical strip attached under the work surface makes getting power easy, without the inconvenience of cords draped across the work surface. A peel-n-stick ruler (this one is 48") attached to the work surface means there's one less item to get in the way.

Modular shelving made from inexpensive mdf (medium density fiberboard) allows for wonderful flexibility. The majority of the shelves in my area are like the one pictured above. They can be hung (see next photo) or stacked. The slots allow thin panels to be inserted either horizontally or vertically as needed.

The shelves can be hung any number of ways, but we found this method to be the most flexible. A wedge-shaped board is screwed to the back of the shelf and two boards, the top one also wedge-shaped, are screwed to the wall. The board attached to the shelves nestles into the top board on the wall while the bottom board on the wall keeps the entire shelving unit equal distance from the wall, top to bottom.

Last but not least, is handy parcel paper and gift wrap storage (please ignore the dust ~ I'd rather be creating than cleaning).

If you have any questions or tips you'd like to share, please post a comment or send an email to me. I welcome your input!

Friday, October 2, 2009

welcome to my studio

Welcome to my studio! Latin guitar is playing on the stereo & cedar incense is burning to sooth the senses. There are warm glows here & there from various little lamps, dragonfly lights, etc. Make yourself at home, be inspired, get paint/ink/clay/whatever on your hands & under your fingernails. Indulge & have fun!

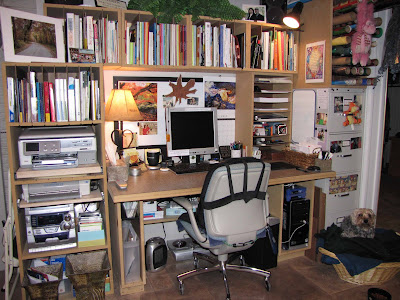
This photo shows the room overall (the other half, behind me as I'm taking the picture, is the yoga/exercise area ~ a very important part of my life too). My very best four-legged friend and puppy soul mate is there in his bed.... with me wherever I go.

This side is set up for card making & painting (the easel is mostly cut off in the picture ~ off to the left with my denim apron hanging from it). Recently gessoed canvas frames are drying on the work surface, calling for me to express myself. If you're interested, you can click on the photo to see more detail.

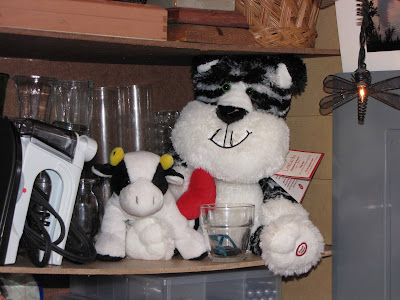
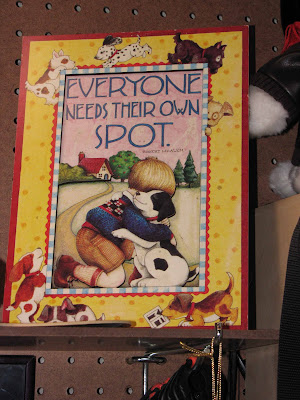
As you can see, I have a weakness for stuffed animals ~ a weakness my wonderful husband indulges me in. There are several stuffed animals sprinkled about the room, helping to lighten the mood when needed, as well as giving me someone else to talk to when our dog stops listening {smile}.

Oh, and speaking of my husband, he's the talented individual who built this studio for me, to my exact specifications. I'm very blessed... and very grateful. He didn't miss a detail. For example, the bottom front edge of the shelf in the third photo has a metal strip, painted black, so I can easily use a magnet to hang instructions in front of me when I'm trying new techniques.

This area is set up for jewelry work, metals, sewing, UTEE, Friendly Plastic (the griddle is a few shelves under the stuffed animals in the last picture) and polymer clay (the oven is behind the butterfly photo on the upper shelf to the right). I don't really need two dremels, but my dad didn't use his anymore and offered it to me, so hey, why not? It's actually come in handy a few times.... having one with a sanding disk attached all the time and the other open for whatever attachment is needed has saved a little time.

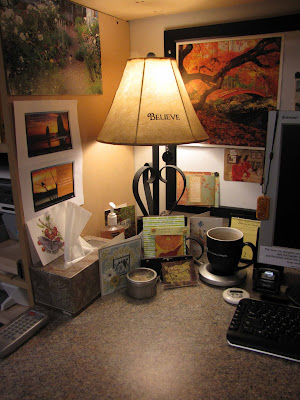
Here is, unfortunately, where I am a lot of the time, instead of creating in the other work areas. There's just so much eye candy in blogland, that I get pulled in. Does this happen to you too? I now have a timer next to the keyboard, to help me manage my time better. Saturday, however, that's going out the window. I'm going to take my time and enjoy the Open Studios Virtual Tour. Come along with me, won't you?

The words on the lampshade, repeated in at least three other places in the room are a constant reminder to myself. BELIEVE.....

Thanks for visiting. If you'd like, leave a comment with your questions or feedback. As most bloggers will tell you, it's not why we blog, but it's a very nice fringe benefit!